Getting Started with LM Studio: Run AI Models Locally
How to download LM Studio for PC
Step 1:
Go to the official LM Studio website. There, you will find versions of the program available for download.
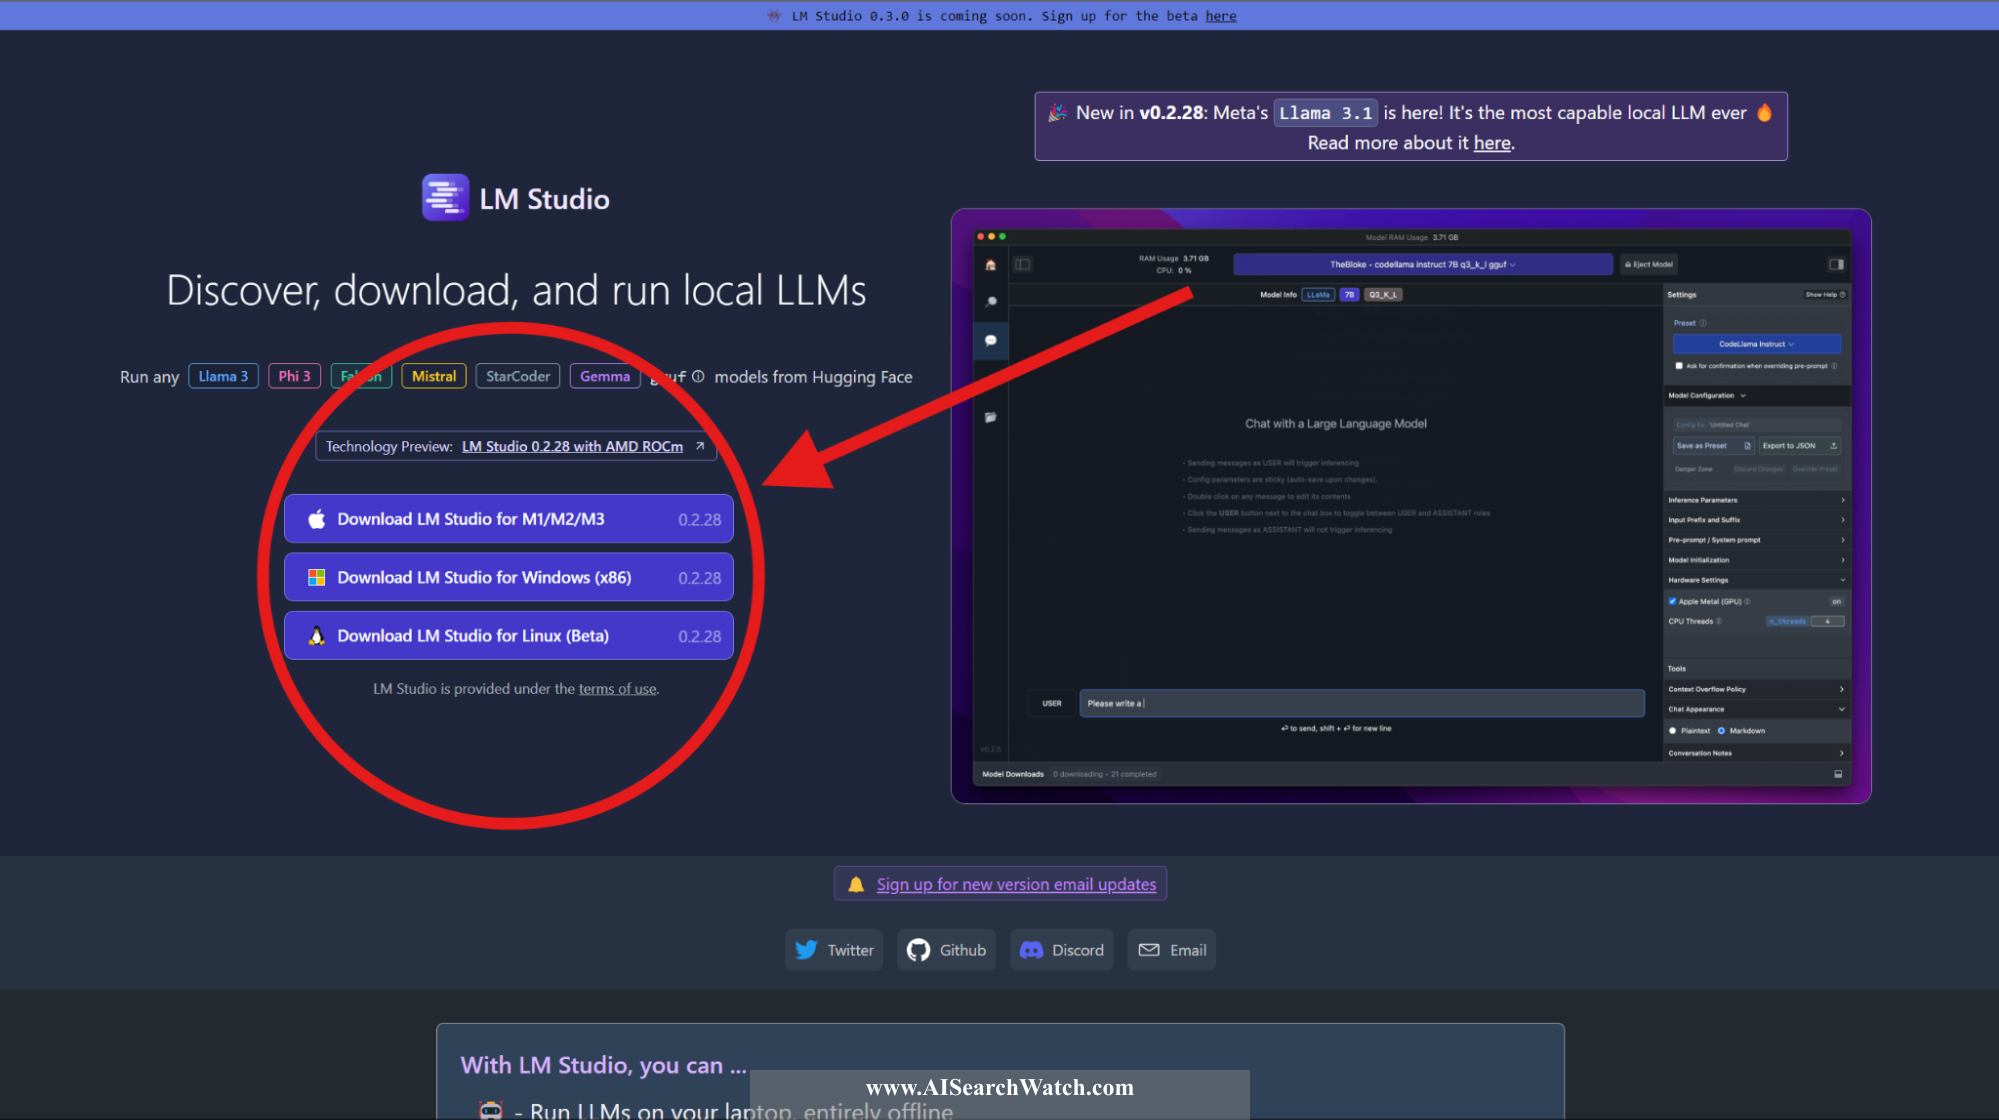
Choose the version that corresponds to your operating system.
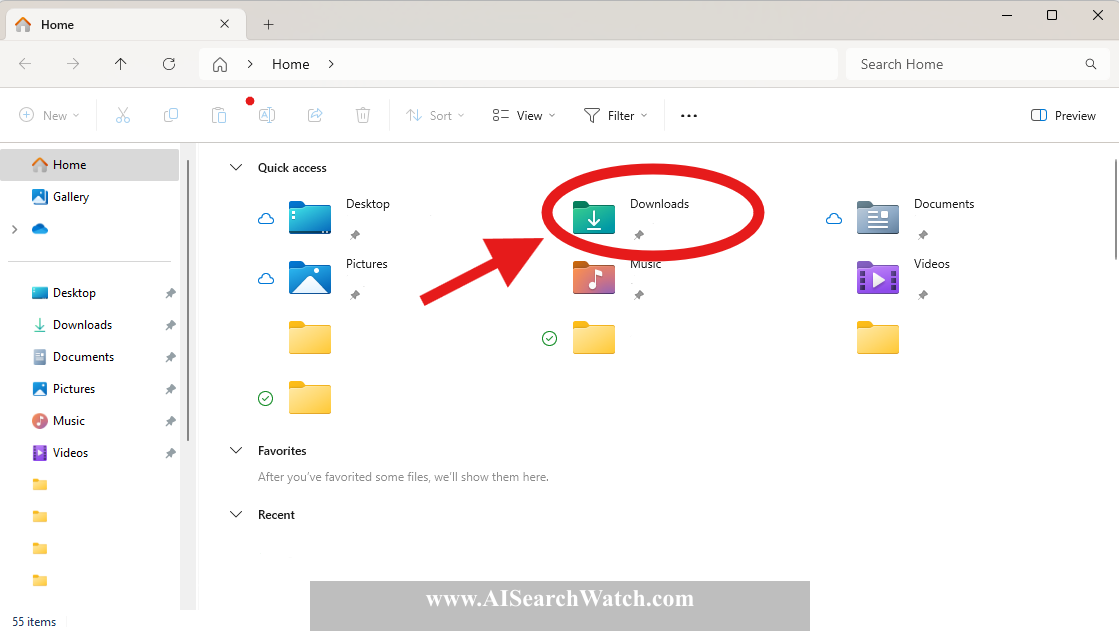
Step 2:
Go to the File Explorer and double-click on the "Downloads" folder.
Step 3:
In the folder, you will see your download. Open the setup program by double-clicking on it.
Step 4:
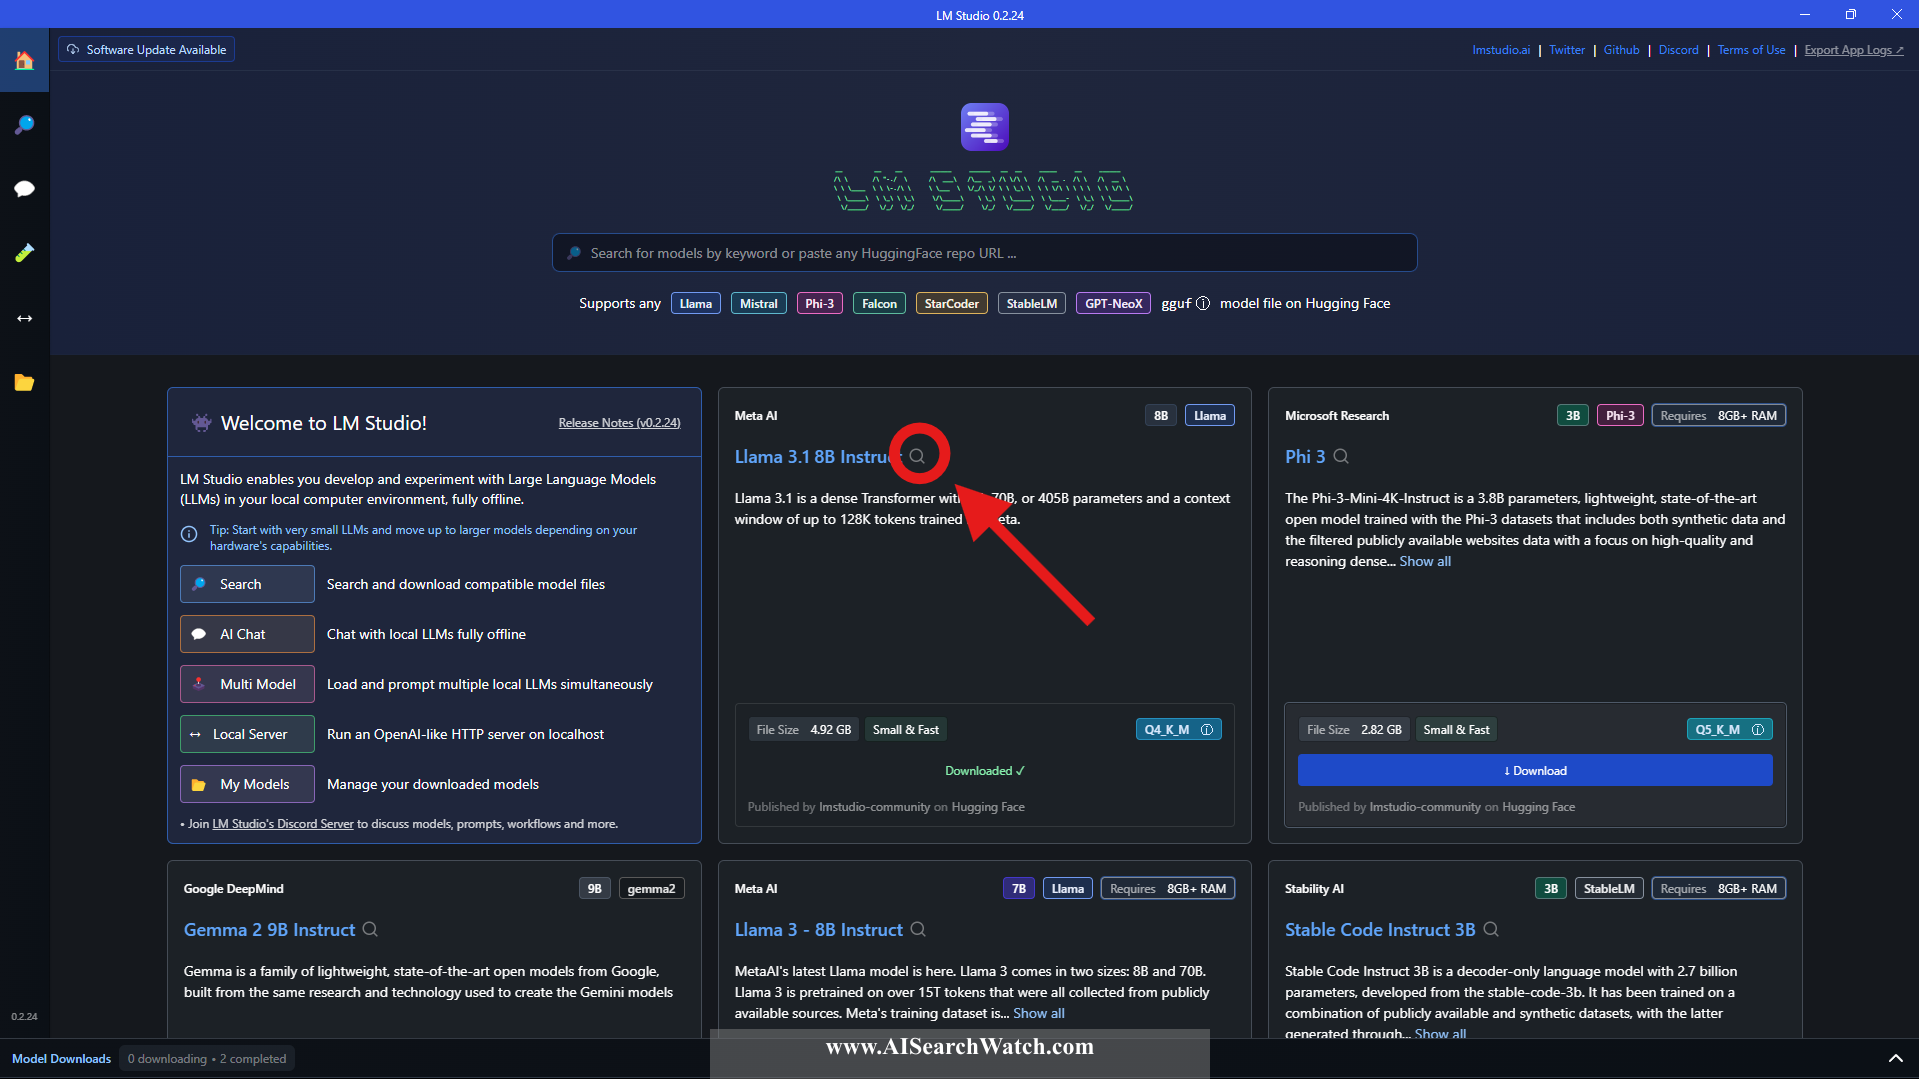
The setup program will install LM Studio on your computer. When the installation is complete, LM Studio will open automatically.
Here, you can see AI models that you can download to your computer. I will show you how to download and use one of them.
How to download and use AI models:
Step 1:
First of all, download a model, such as the most popular one available. To explore different versions, click on the magnifying glass icon.
Step 2:
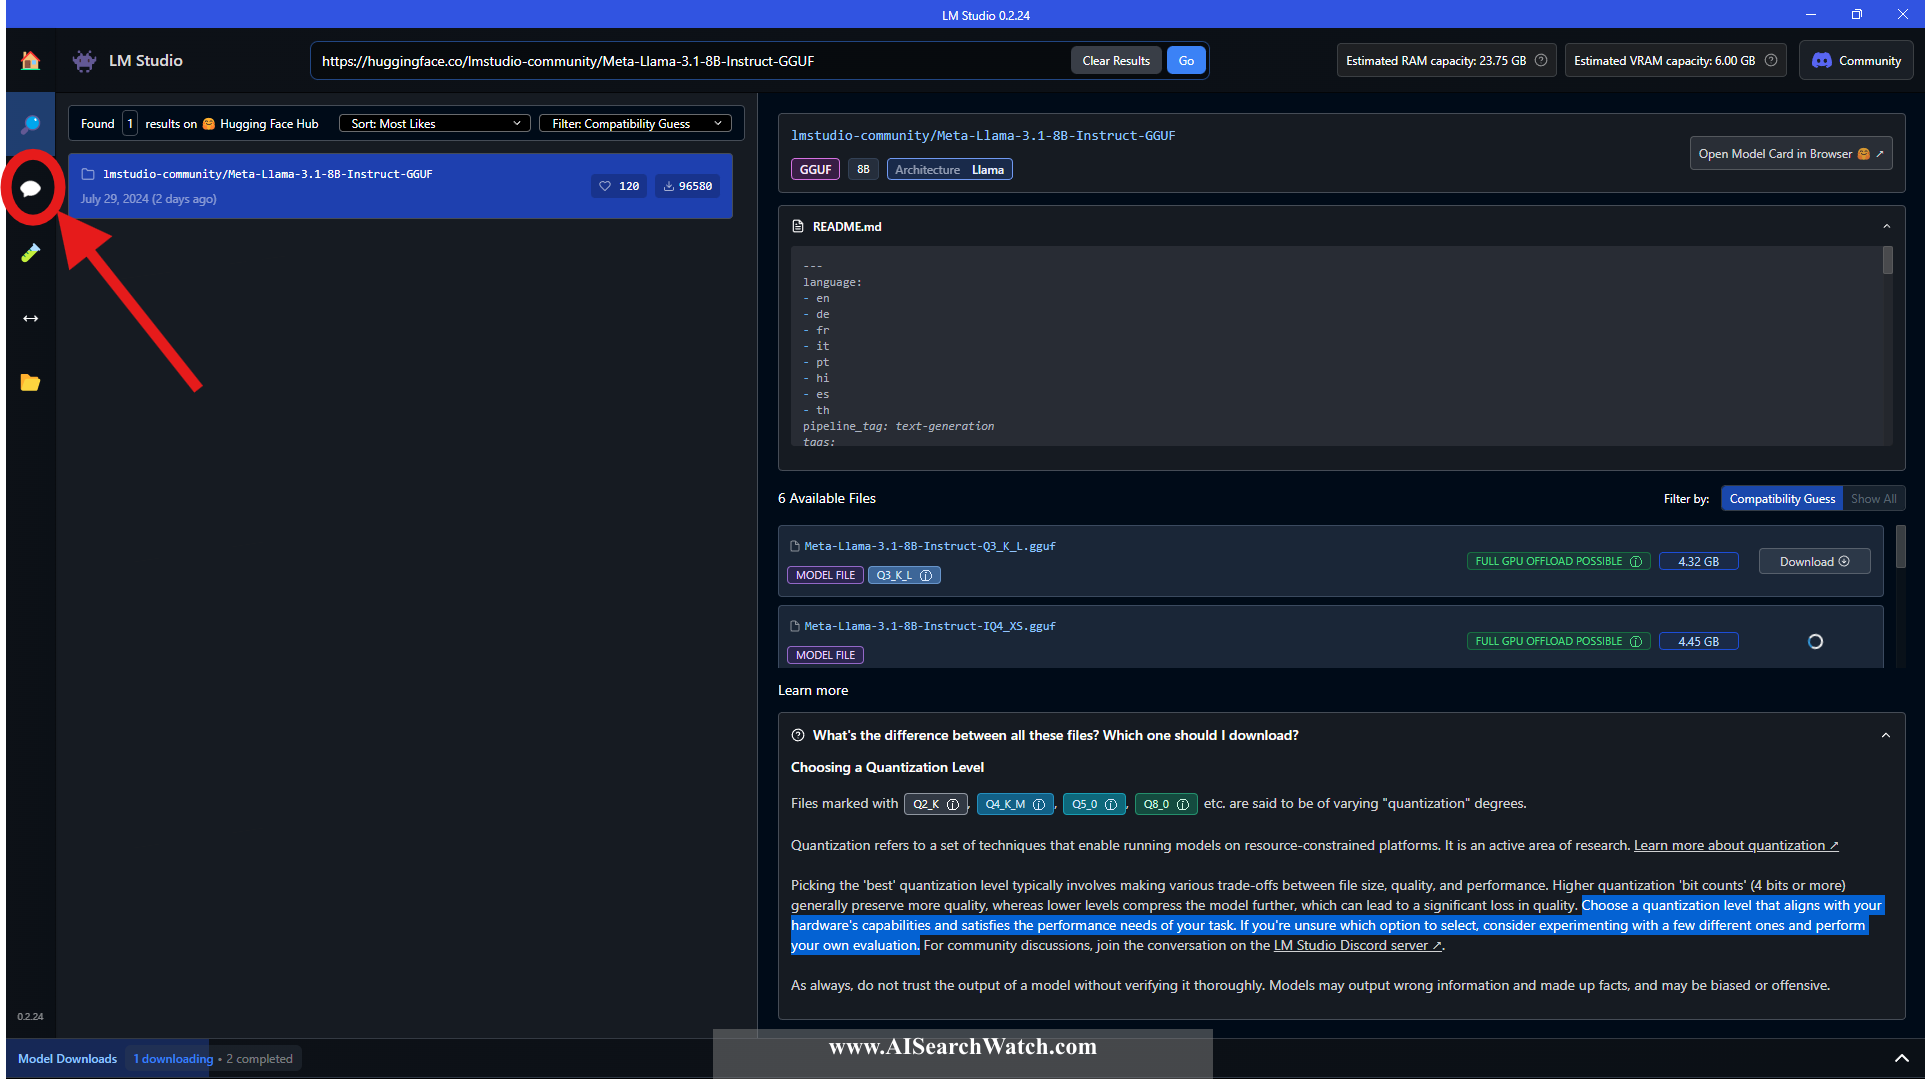
Select your version and download it. The versions differ in two aspects:
-
Quantization:
- Files marked with
Q2_K,Q4_K_M, etc., indicate varying degrees of quantization. - Quantization refers to techniques that enable running models on resource-constrained platforms. It is an active area of research.
- Choosing the "best" quantization level typically involves trade-offs between file size, quality, and performance.
- Higher quantization bit counts (4 bits or more) generally preserve more quality, whereas lower levels compress the model further, which can lead to a significant loss in quality.
- Files marked with
-
GPU OFFLOAD:
- Full GPU Offload Possible: Versions with this label might fit entirely in your GPU's memory, significantly speeding up inference.
- Partial GPU Offload Possible: Versions with this label might fit partially in your GPU's memory, often considerably speeding up inference.
Choose a quantization level that aligns with your hardware's capabilities and meets the performance needs of your task. If you're unsure which option to select, consider experimenting with a few different ones and performing your own evaluation. You can try different versions to see if better ones can run on your PC.

When you select your version, wait until it has fully downloaded.
Step 3
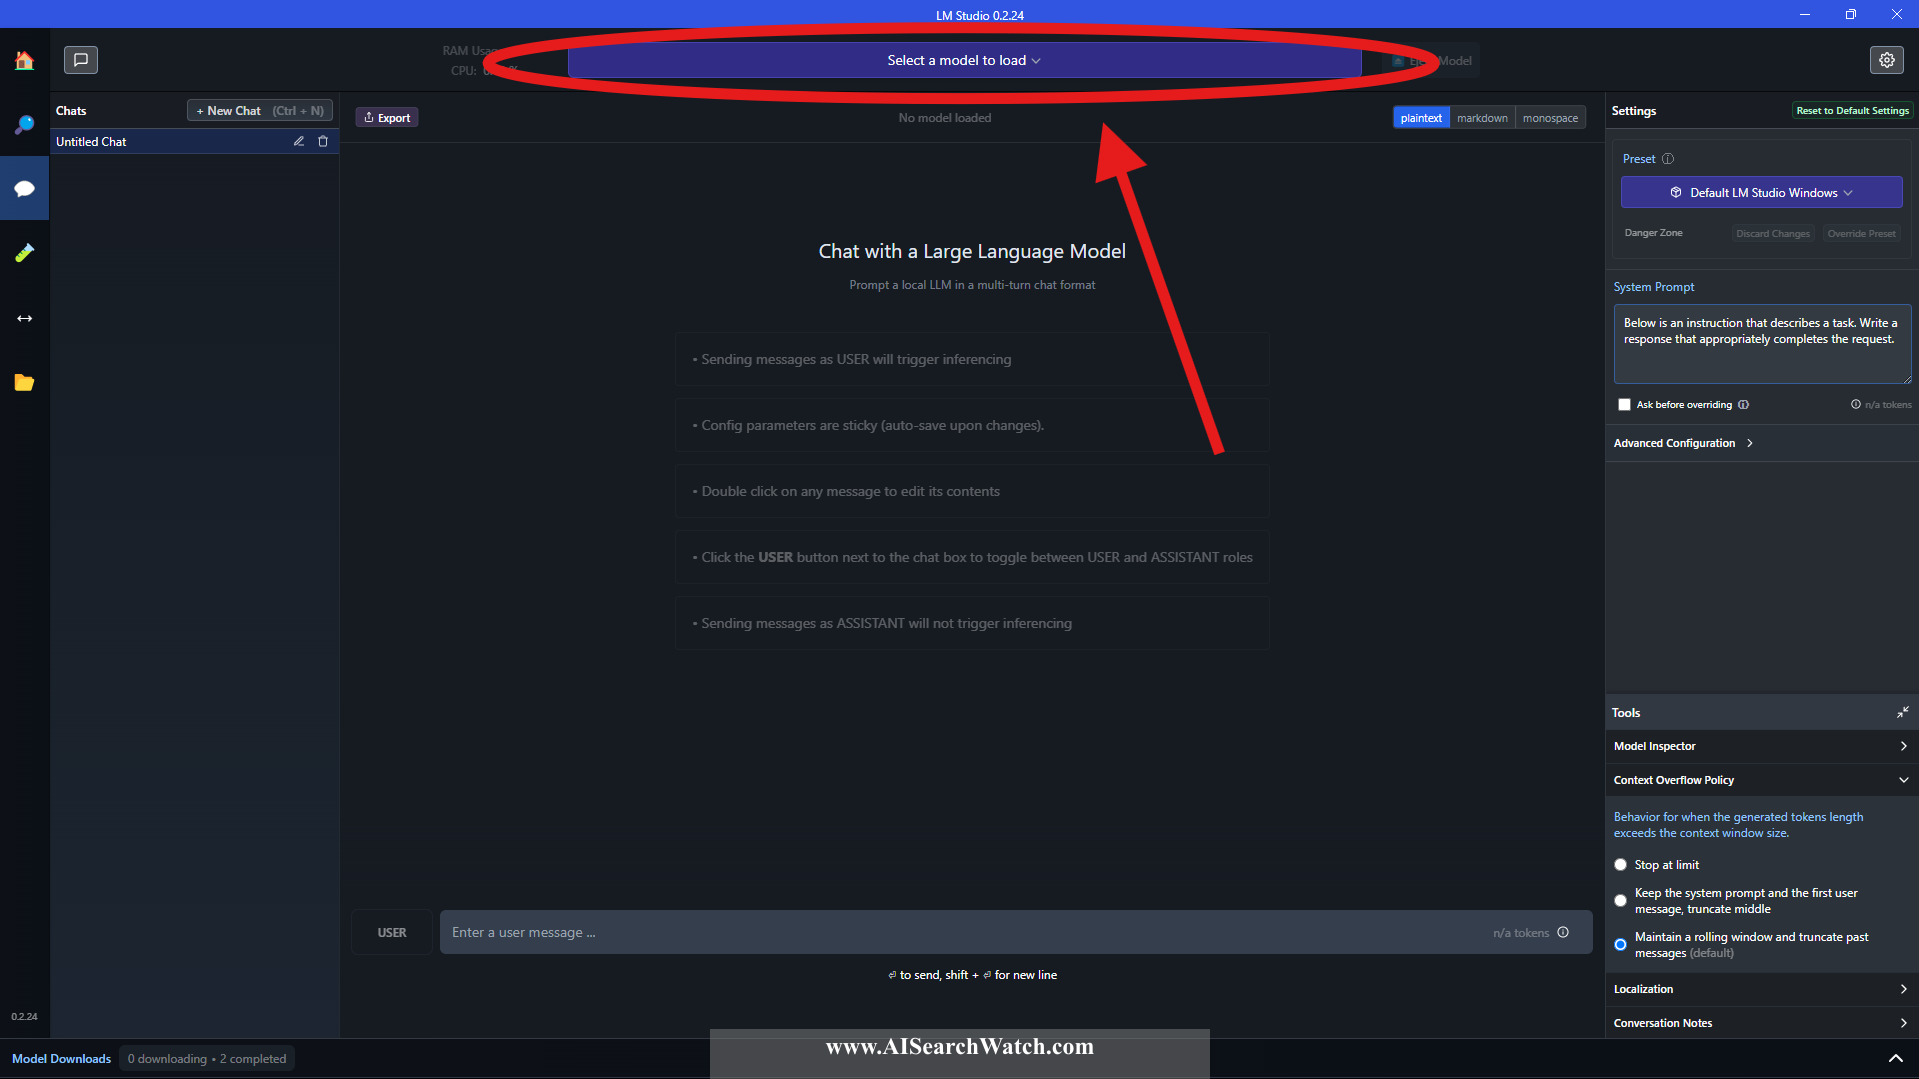
Once it has downloaded, click on "AI Chat."
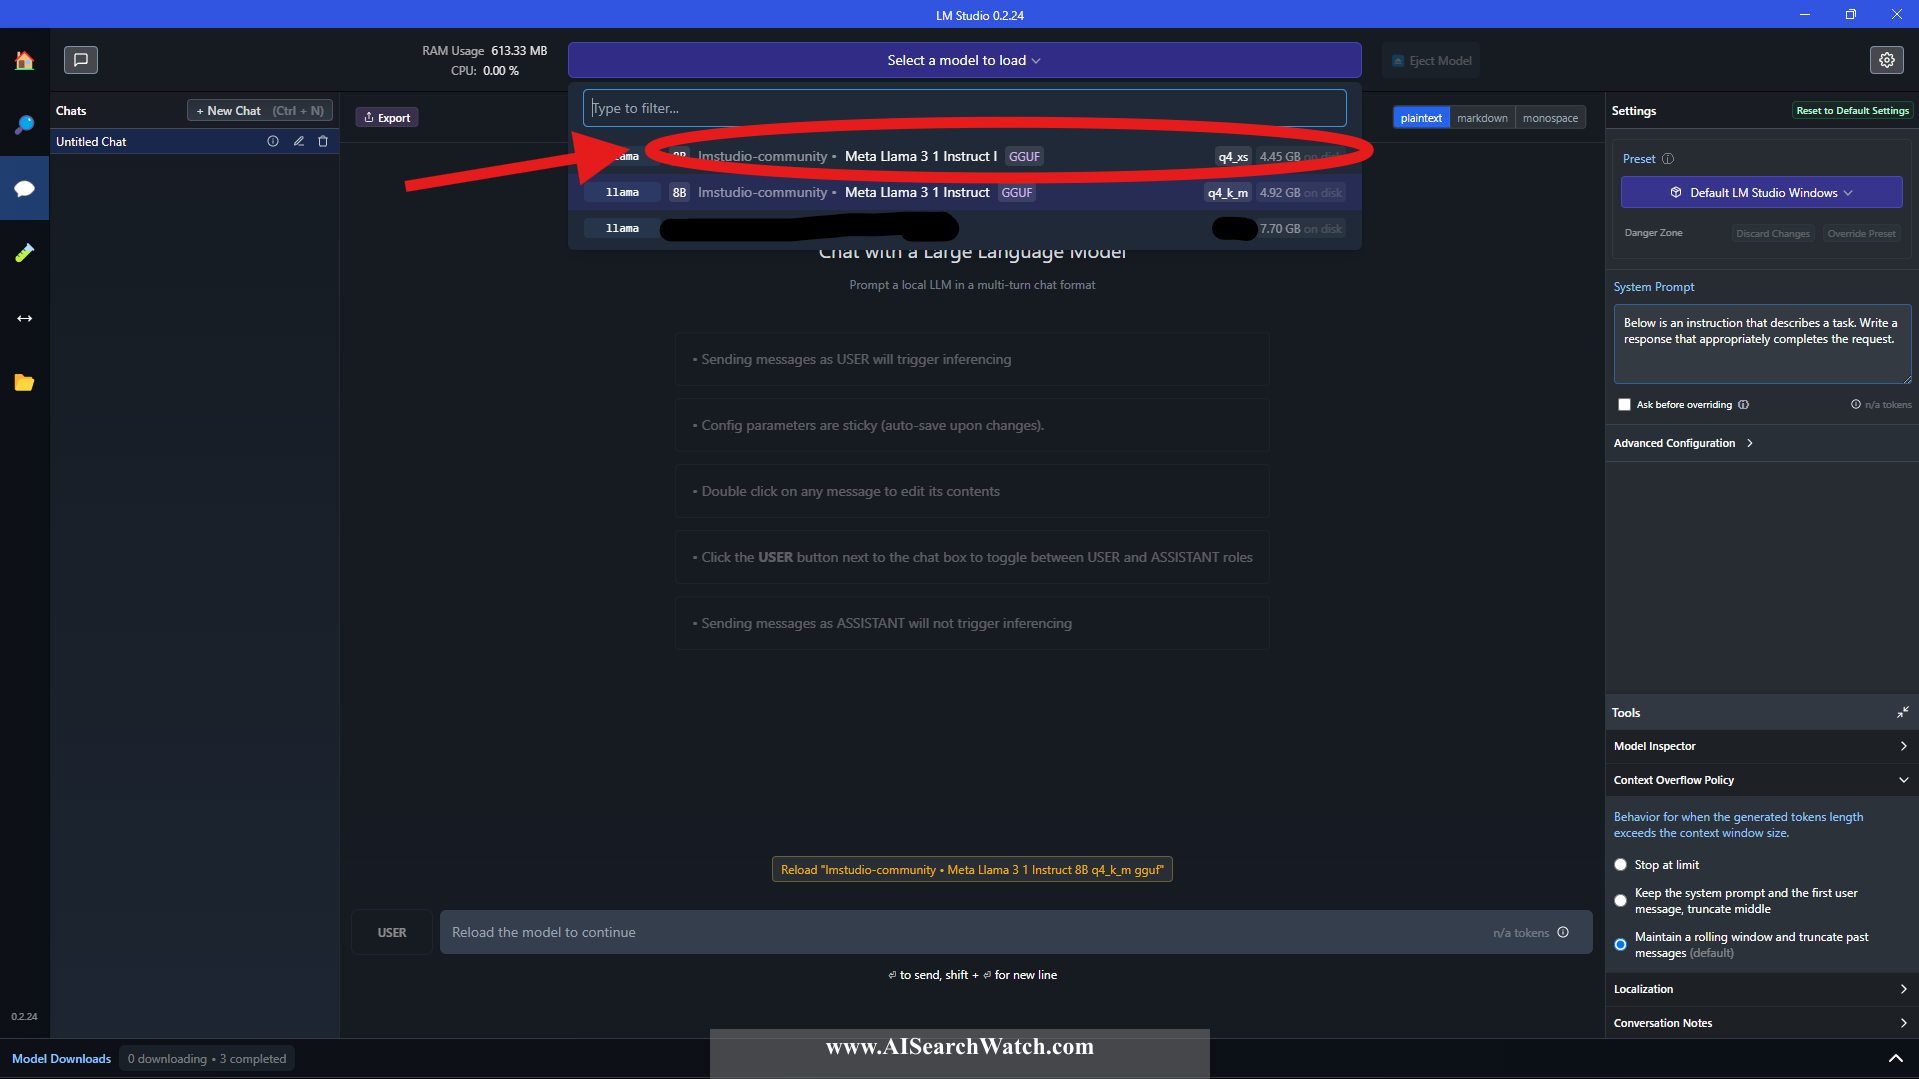
Then you need to select the model. To do this, press the top button.
Then select your model:
That's all there is to setting up the AI. Now we can interact with it and assign tasks:
Let's give it a task by typing a prompt askinug to generate a website in HTML.
Type in the following into the User input at the bottom of the app:
My name is John. Generate HTML page for website about me
And press Enter

Once you press Enter this will generate a response by LM Studio app using only the locally loaded LLM model that works without Internet required:
<!DOCTYPE html>
<html lang="en">
<head>
<meta charset="UTF-8">
<meta name="viewport" content="width=device-width, initial-scale=1.0">
<title>John</title>
<link rel="stylesheet" href="style.css"> <!-- You can add a link to an external stylesheet or include your custom styles here -->
</head>
<body>
<header>
<nav>
<ul>
<li><a href="#about">About Me</a></li>
<li><a href="#skills">Skills</a></li>
<li><a href="#experience">Experience</a></li> <!-- You can add more links as needed -->
<li><a href="#contact">Contact</a></li>
</ul>
</nav>
</header>
<main>
<section id="hero">
<h1>Welcome to my website!</h1>
<p>I'm John, and this is a little bit about me.</p>
<!-- Add an image or some text to make it more interesting -->
</section>
<section id="about">
<h2>About Me</h2>
<p>Lorem ipsum dolor sit amet, consectetur adipiscing elit. Sed sit amet nulla auctor, vestibulum magna sed, convallis ex.</p> <!-- Add your bio here -->
</section>
<section id="skills">
<h2>Skills</h2>
<ul>
<li>Coding skills (e.g., programming languages)</li>
<li>Soft skills (e.g., communication, teamwork)</li>
<!-- Add more skills as needed -->
</ul>
</section>
<section id="experience">
<h2>Experience</h2>
<ul>
<li>Job 1 (date) - Job title: Brief description of job duties and accomplishments</li>
<li>Job 2 (date) - Job title: Brief description of job duties and accomplishments</li>
<!-- Add more experience as needed -->
</ul>
</section>
<section id="contact">
<h2>Contact Me</h2>
<p>Lorem ipsum dolor sit amet, consectetur adipiscing elit. Sed sit amet nulla auctor, vestibulum magna sed, convallis ex.</p>
<!-- Add your contact info here (e.g., email, phone number, social media links) -->
</section>
</main>
<footer>
<p>© 2023 John</p>
</footer>
<script src="script.js"> <!-- You can add a link to an external script or include your custom JavaScript here --></script>
</body>
</html>
About The Author

Eugene Mi
Experienced SEO marketer with 15+ years of experience. Worked with Fortune 500 companies and startups.
Continue Reading:
Use AI with Full Privacy - AI Search Watch
Discover how Local Large Language Models (LLMs) allow you to leverage AI technology while maintaining...
What is an AI Search Engine?
Learn about AI search engines—how they utilize artificial intelligence to enhance internet searching by providing...
Free AI Search Watch Reports November 2024
Free AI Search Watch reports for November 2024.